


Silicone sealant can be tricky work
A silicone seal between your bath or shower and your new bathroom panels is essential to help stop leaks and subsequent damage.
But how do you apply bathroom sealant neatly around uPVC, baths and showers ? It can be effortless to do with some practice and good preparation, but it can also create a real mess if you’re in a rush or a little trigger happy. So we thought it would be helpful to put down a few tips to help you apply your silicone well and give it a clean, smart finish.
Silicone sealant can be tricky to work with so preparation is the key to success. Get your tools and materials together, read through the steps below, choose a small section to start with and visualise the process. From there take your time and don’t panic if you make a mistake. Speed and accuracy will come after each section so start small and build up as you go. Also, if it’s your first time using a sealant gun practice using it on a bit of cardboard first, before using them around your bathroom utilities and products.
Use masking tape before you gun the silicone to save time later
Tip #1
Ever spent an hour scraping off paint telling yourself off for not taking thirty seconds to place a strip of masking tape? Same applies here. So do yourself a favour and put two lengths of tape down either side of the join. After you have applied your masking tape on both sides of the join, leave a 3-4mm gap on either side so you have a straight and even edge. Even if you have no experience using silicone sealant this method is a great way to ensure minimal mess and a clean finish.
Just make sure there’s enough space left either side for the sealant to grip. This will not only save time but a lot of potential mess over your walls, furniture and your hands. Don’t forget to remove the masking tape while the silicone is still wet, this will leave you with a clean and smooth band of sealant.
Apply the silicone in the join and around any edges
Tip #2

Take off the top of the S3 sealant tube and place it in our caulk gun. Next, screw the nozzle on and cut the tip at an angle. Start at the rear corner and run a bead forward until you reach the end of the join.
If you are sealing a shower or wet room enclosure make sure to only seal the outside of the shower or enclosure and any joins recommended by the manufacturer of your materials. This is an essential step to take to avoid stagnant water and unpleasant smells. Running water should have the freedom to flow back into the shower area and drain. If you were to seal the inside of your shower or enclosure the water would quickly degrade your sealant resulting in leaks and mouldy sealant.
Apply the silicone in the join and around any edges
Tip #3
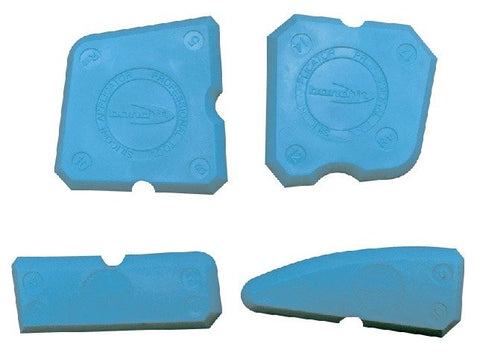
Pro’s with years of experience can usually skip this step, but if you’re out of practice, this could really help you out. Time for the applicator toolkit! Choose the right one and merely run it firmly to get the required edge. This not only pushes the silicone into any gaps but it gives it an elegant, professional finish as it removes any excess.
There’s a great of tools available designed to give you a nice smooth finish. You can find a wide range of silicone application tools available at any local DIY store or large retailer such as B&Q. One of the most popular and widely accessible tools at the moment is the Cramer 5-Fugi Kit. This is perfect if you are doing multiple sealant jobs as it comes with various sizes to efficiently apply sealant to any joint gap. To get a seamless finish, here’s a top tip for smoothing your sealant; lightly wet the your finger and the silicone smoothing tool to prevent the silicone from sticking and remove any excess after each use.
Don’t overuse the tool before wiping clean or swapping as it will start dropping off onto other surfaces. The next step, before the silicone has time to dry, is to carefully peel away the masking tape away from the join.
Put the caulk gun down!
Tip #4

Keep alternating from running beads of sealant and then finishing them. Try not to be tempted to rush laying down all the beads before tidying them up because silicone starts to dry very quickly and finishing generally takes more time. The aim is to get the silicone as smooth and even as possible. This is essential to prevent any excess scum getting trapped and allows water to run off the panels and seal smoothly. This is a small method to take up to ensure your sealant lasts longer.
So if you’ve laid down a lot of silicone, you’ll find it too hard to clean away easily and potentially you’ll start creating more mess and get a weaker finish. Silicone has the ability to expand so you can expect small amounts of push and pull on seals. This is especially important when it comes to sealing a bath tub; make sure you fill your bath tub with water before sealing around it. The more you use you bath there will be small movements and pulling on the seal. So filling your bath tub with water as you seal will simulate this pressure of extra weight and movement and will protect the structure of your tub for any future use.

